Ever walked across a garden path and felt that the surface wasn’t pleasant? Like the sudden movement under your foot? When it comes to outdoor flooring, it’s meant for your comfort, not the other way round. Stepping stones are meant to guide you gently through a space. A stable path feels safe, solid and intentional. An uneven one feels unfinished. The good news is that keeping stones isn’t complicated at all. It just takes the right base and professional installation. When done properly, your path won’t just look beautiful; it will stay firm and steady for years. And Bluestone is one of the popular choices due to its beautiful colour. Let’s understand more about it in depth.
Why Stepping Stones Become Uneven
Before fixing the problem, it helps to understand why it happens
Stepping stones usually shift because of:
- Poor or shallow base preparation.
- Loose Soil Underneath.
- Water erosion after heavy rain.
- Growth of Tree roots underneath.
- Frequent foot traffic.
Most wobbling starts below the surface, not on top. So the real solution is always in the foundation.
Start With Proper Ground Preparation
This is where most people cut corners. And it’s the biggest mistake. A strong base is what keeps each stepping stone stable and level long term.
Plan the Layout First
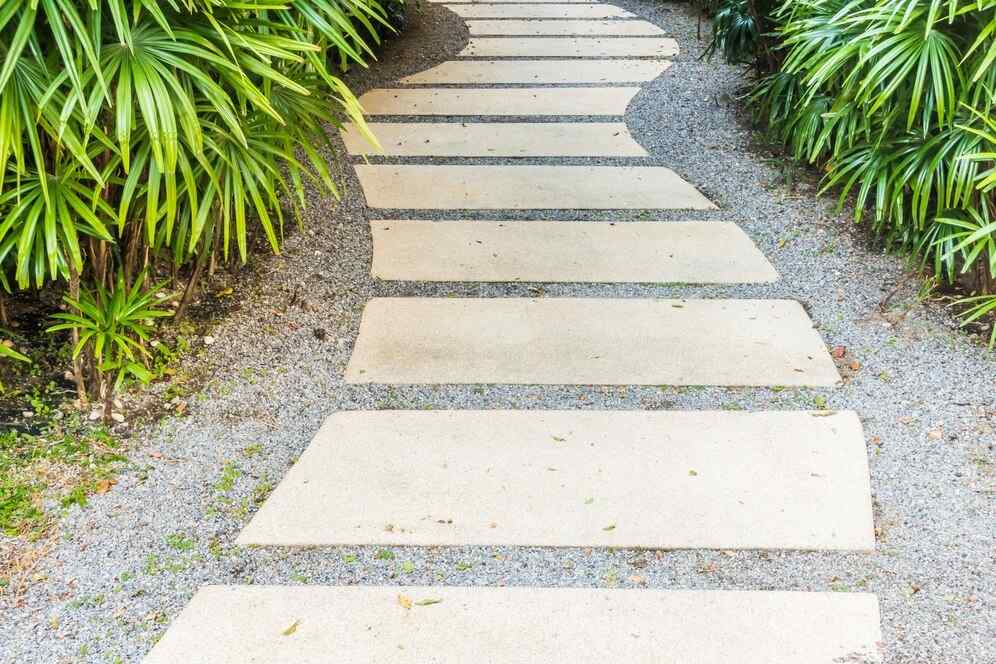
Before digging, lay the stones out on the ground and walk across them naturally. Adjust the spacing until it feels comfortable and balanced.
For most pathways:
- Keep spacing between 450–600mm depending on stride.
- Ensure alignment feels natural to walk across
- Avoid unnecessary stretching gaps
Once satisfied, outline each stone’s position so you know exactly where to dig.
Dig to the Correct Depth
One of the most common mistakes is digging too shallow. A clean finish and better stability can be achieved by placing stones slightly lower than the lawn or soil around it.
To calculate depth, allow for:
- Stone thickness.
- 75–100mm base material.
- 20–30mm leveling sand.
For example, if your stone is 30mm thick, you should dig approximately 100–130mm deep. This ensures the stone doesn’t sit directly on loose soil and forms a solid base.
Build a Strong, Compacted Base
The base is what keeps stepping stones from wobbling long term. Skipping this step leads to movement within months.
A proper base typically includes:
1. Crushed rock (50–75mm)
Provides strength and promotes drainage. This layer must be compacted firmly.
2. Sharp sand layer (20–30mm)
Allows fine adjustments for leveling. Each layer should be compacted before moving to the next. A hand tamper works well for small areas. It is possible for even the heaviest Bluestone Stepping stone to shift over time without compaction.
Level Each Stone Carefully
Place the stone onto the prepared base and check it using a spirit level. If one side is higher, lift the stone and adjust the sand evenly. Tap gently with a rubber mallet to settle it.
Important checks:
- The stone should not move when stepped on.
- The surface should sit flush or slightly below surrounding ground.
- The stone should feel firm under full body weight, if it moves even slightly, reset it properly rather than patching one side.
Focus on Drainage
Water is one of the biggest causes of instability. Poor drainage can:
- Wash away base material.
- Cause sinking.
- Create tilting over time.
Use free-draining crushed rock rather than clay-heavy soil. Avoid placing stones in low spots where water naturally collects. Slightly sloping the base can also help manage water runoff. Proper drainage can significantly extend the life of a stepping stone for gardens, especially in areas with regular watering.
Common Installation Mistakes to Avoid
Many uneven paths result from rushed installation. Avoid:
- Placing stones directly on soil.
- Skipping compaction.
- Ignoring drainage.
- Using uneven sand thickness.
- Installing during very wet conditions.
Creating a Natural Look Without Losing Stability
You can achieve a relaxed, organic design while still keeping everything secure. Slightly offset alignment, blend edges into lawn or gravel and incorporate surrounding plants for a softer appearance. A well-installed stepping stone for gardens should feel natural underfoot but completely stable.
Final Thoughts
A stepping stone path should feel effortless and safe. Stability doesn’t come easily; it comes from high-quality materials and planning in advance. Dig deep enough, build a compacted base, ensure proper drainage and level each stone carefully. When installed correctly, every bluestone stepping stone will stay firm, level and beautiful for years. The strength is always underneath and that’s what makes the difference.